TR069 Configuration
Important
TR069 Workflow
Next, follow the steps to configure TR069 in your AdminOLT account, it is important to follow the steps according to the workflow presented to avoid any inconvenience:
- Get TR069 Server
- Apply Initial Configuration
- Add VPN User TR069
- Add LAN Network TR069
- Authorize ONU with TR069
- WAN IP TR069 (Optional)
- WIFI Configuration TR069 (Optional)
- Basic VOIP Configuration TR069 (Optional)
- IGMP Configuration TR069 (Optional)
- Ports Configuration TR069 (Optional)
- Apply TR069 configurations
Get TR069 Server
To get a TR069 Server, you must contact our support team.
Follow the steps to Apply Initial Configuration
Once we have our TR069 Server, we can apply the Initial Configuration so that a TR069 Server Profile is generated for us to use when authorizing an ONU.
Follow the steps to Add VPN User TR069
Once we have our TR069 Server, we can add a VPN user so that there is communication between our Mikrotik and our TR069 Server.
Follow the steps to Add LAN Network TR069
Once we have our VPN User, we can add a LAN Network to our TR069 Server. This acts as a route for the TR069 Server to communicate with the IP ranges we add.
Authorize ONU with TR069
To see the devices that have not yet been authorized, we must go to the ONU section > Unauthorized.
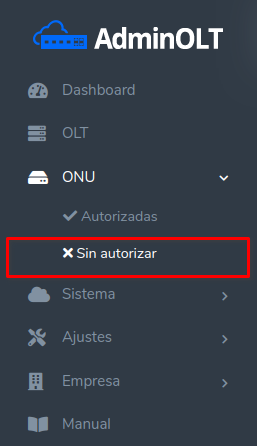
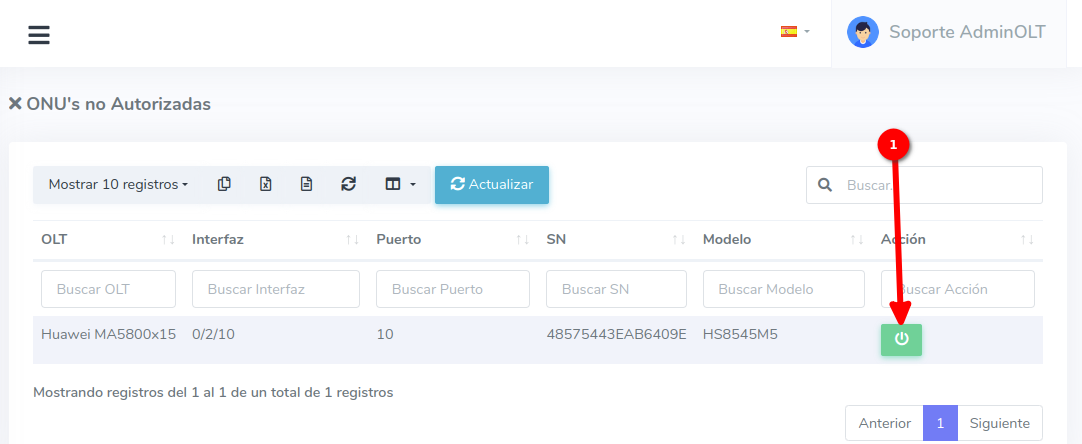
1To authorize the ONU, we select the action "Authorize ONU".
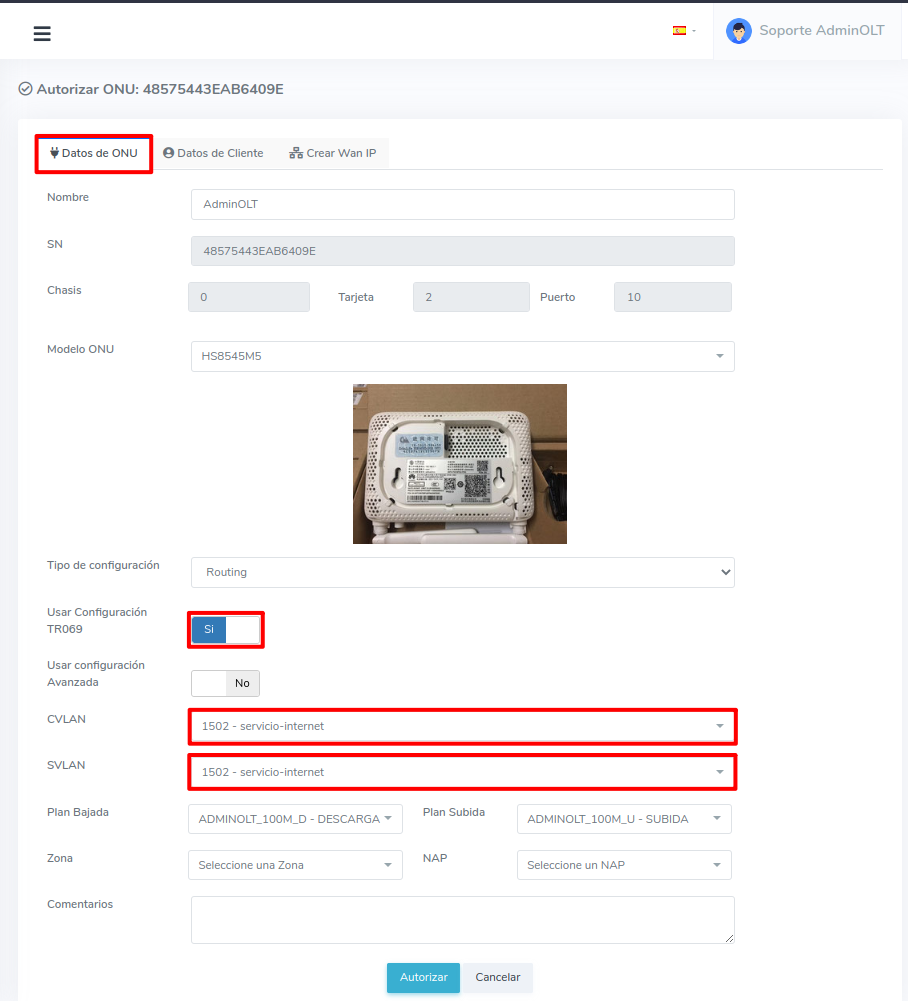
2When selecting the authorize ONU option, we will see the following form with the details of the ONU. We can assign it to the VLAN, set the upload and download speed, and additionally, we can choose to Use TR069 Configuration, among other options.
NOTE
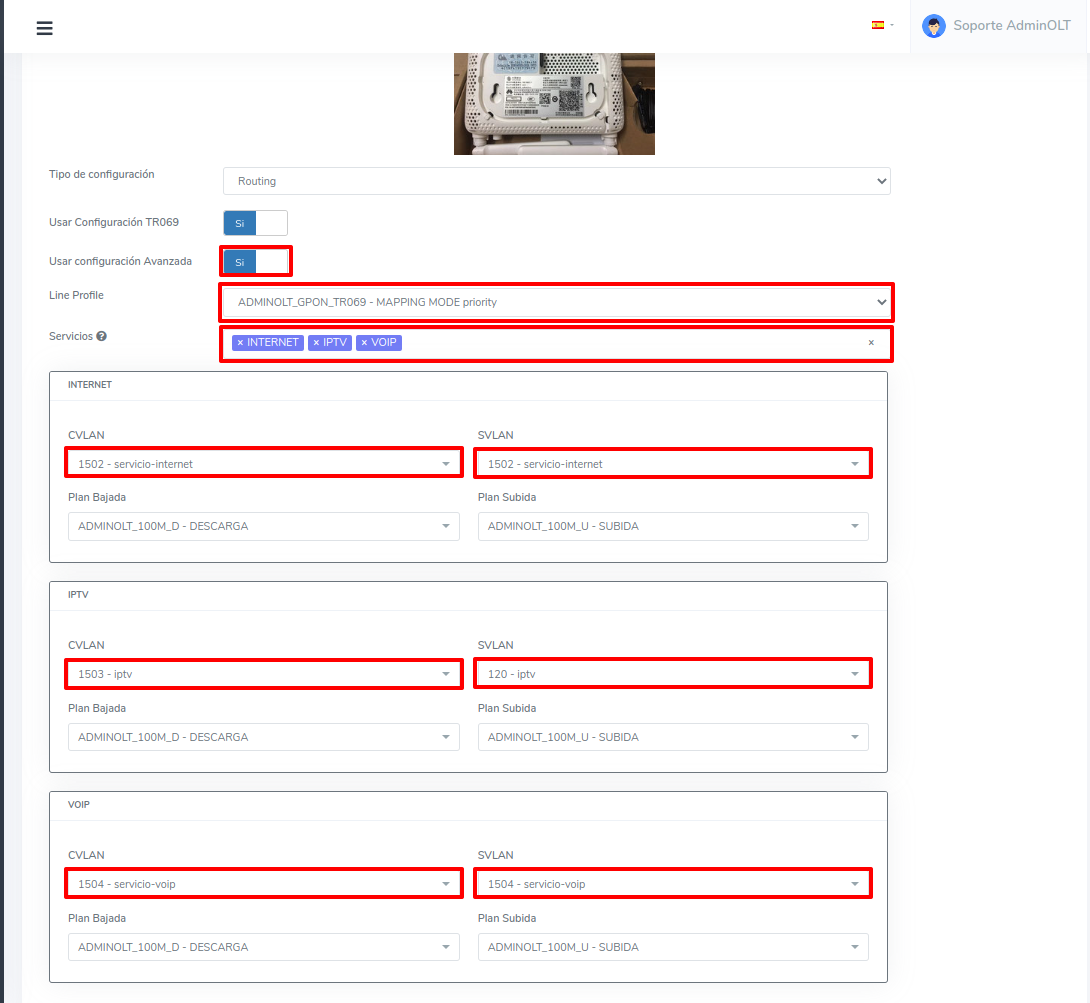
- Line Profile: you will find a list of Line Profiles created in AdminOLT belonging to the selected OLT. In this example, we will select ADMINOLT_GPON_TR069
- Services: related to the selected Line Profile, if "Create generic profile" is selected, you can choose from the different types of services available (INTERNET, IPTV, VOIP, NMS)
NOTE
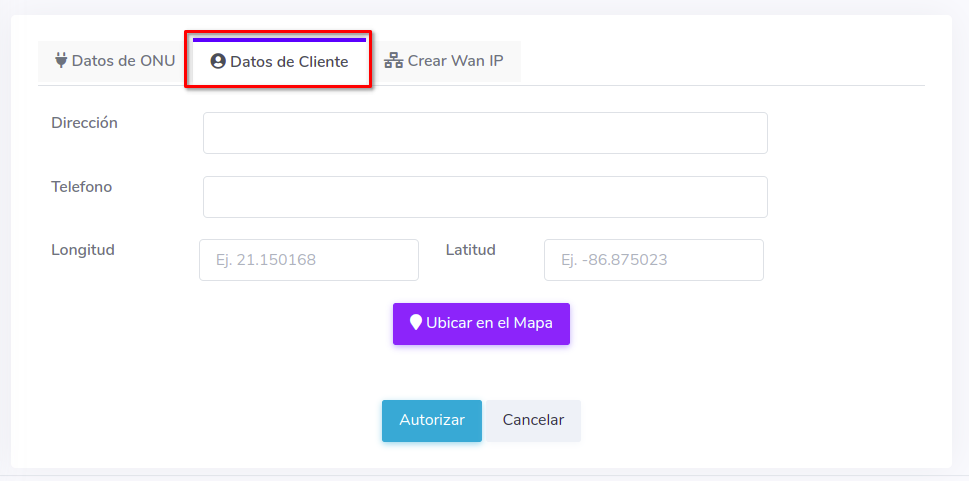
NOTE
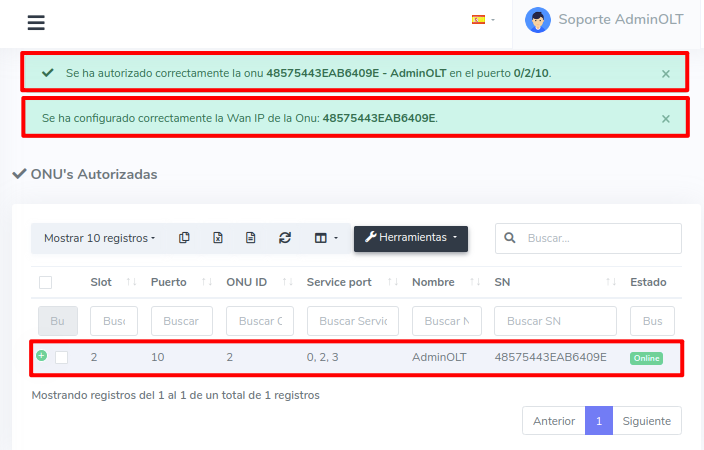
3After saving the ONU data, we will be redirected to the view of authorized ONUs where we can see the ONUs we have authorized.
Follow the steps to WAN IP TR069
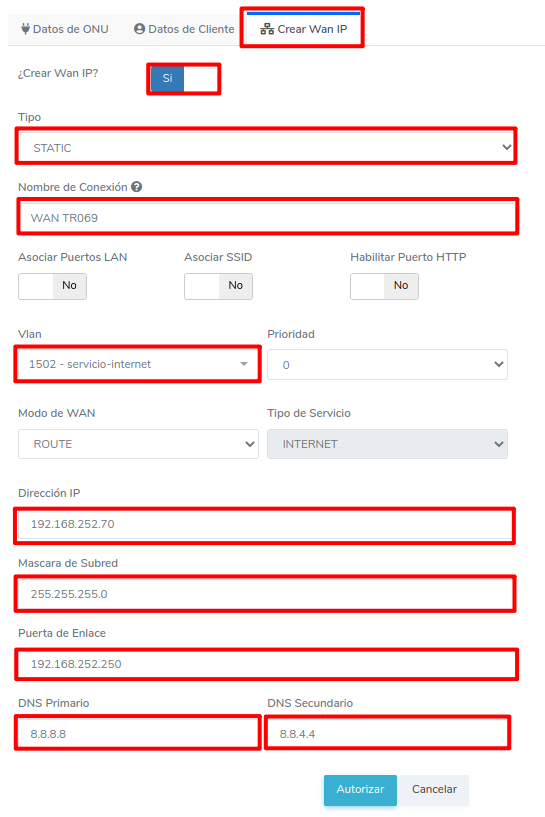
We can add WAN IP TR069 from AdminOLT, with the novelty that a WAN IPv6 can be added, so that this configuration resists restarts and resets of the ONU.
Follow the steps to WIFI Configuration TR069
We can add WIFI Configuration, this means we can choose the SSID and Password of our ONU, so that this configuration resists restarts and resets of the ONU.
Follow the steps to Basic VOIP Configuration TR069
We can add Basic TR069 Configuration, this means we can add the information needed to activate the VOIP service, so that this configuration resists restarts and resets of the ONU.
Follow the steps to IGMP Configuration TR069
We can add IGMP Configuration TR069, this means we can activate or deactivate IGMP, so that this configuration resists restarts and resets of the ONU.
Follow the steps to Ports Configuration TR069
We can add Ports Configuration TR069, this means we can activate or deactivate HTTP and/or Telnet ports, so that this configuration resists restarts and resets of the ONU.
Apply TR069 Configurations
After configuring all the above information in AdminOLT, we must apply it to the ONU.
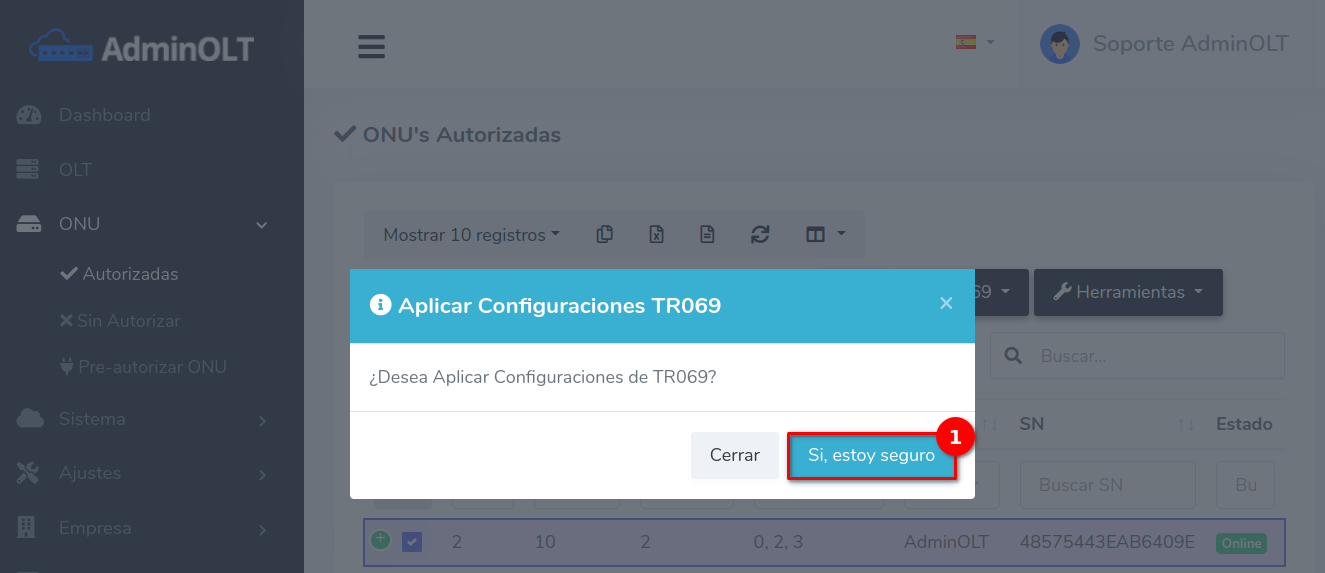
1We go to the ONU > Authorized section. Select the ONU to which we will add the WAN IP, click on TR069 > Apply TR069 Configurations. To select the option with the label Apply TR069 Configurations

And confirm the action
April 12, 2024, 3:32 p.m. - Visitas: 23869
