Configuration on MikroTik RouterBoard for C-Data OLT
Note
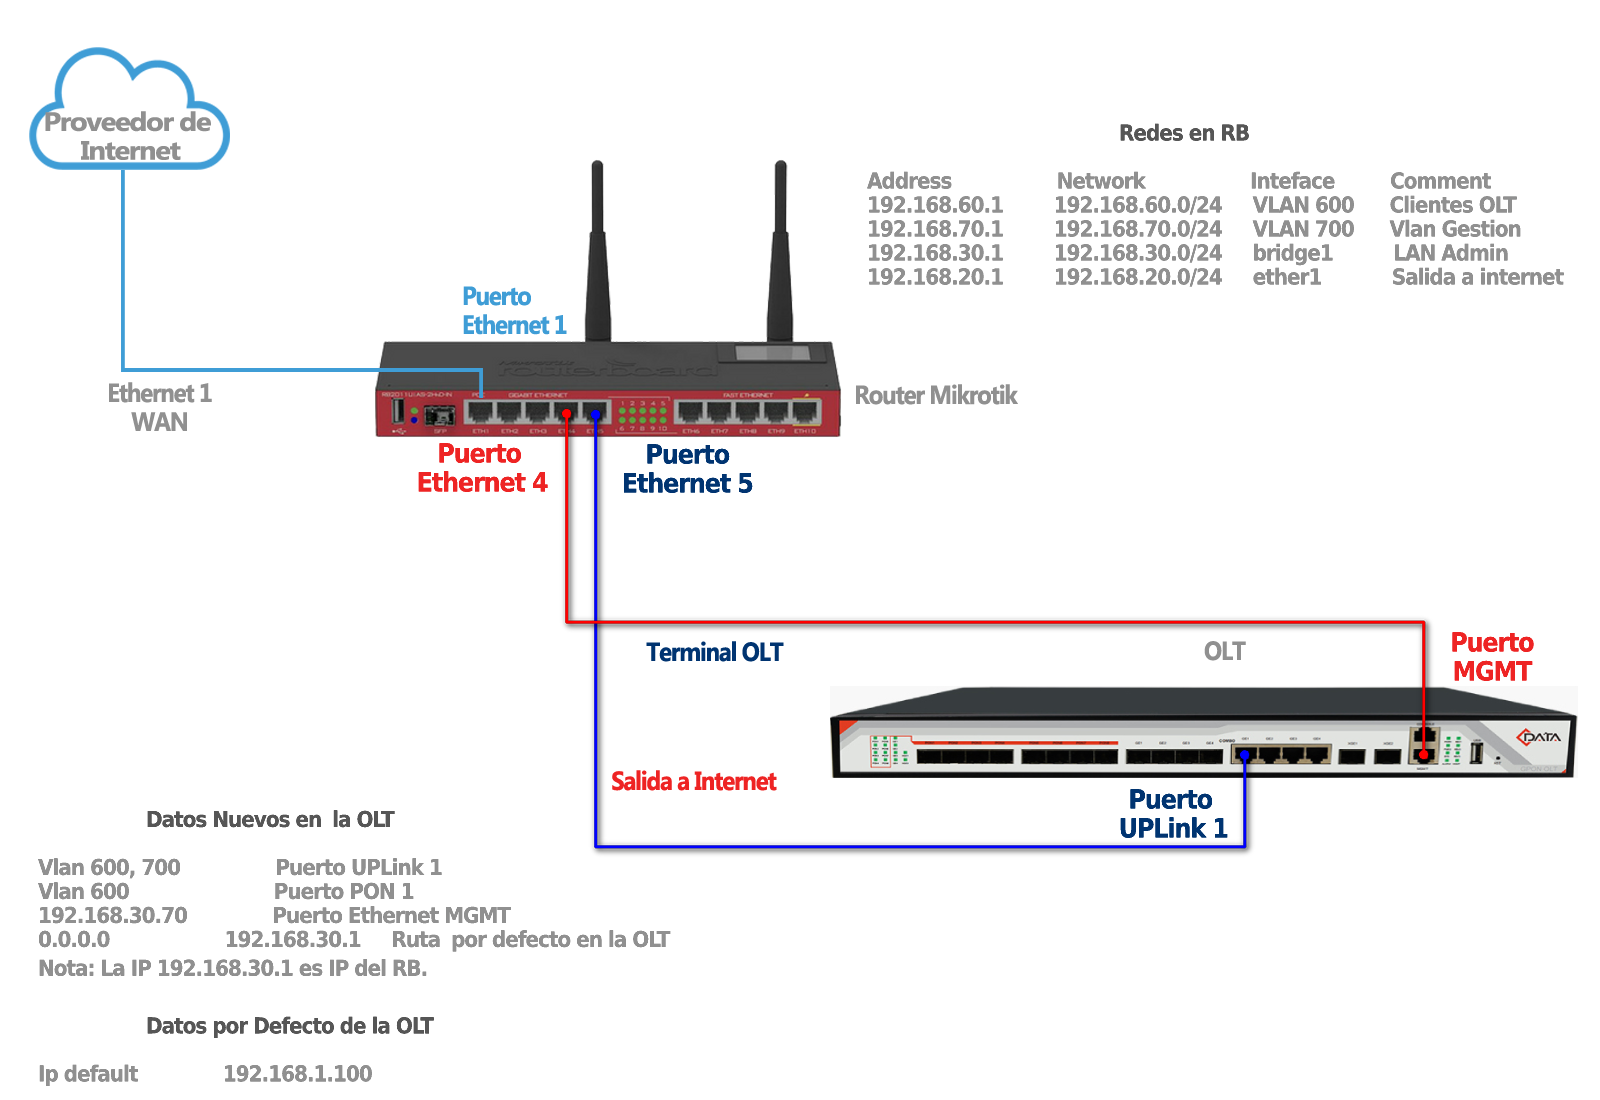
Router with Internet Output
Connection through Ethernet port.
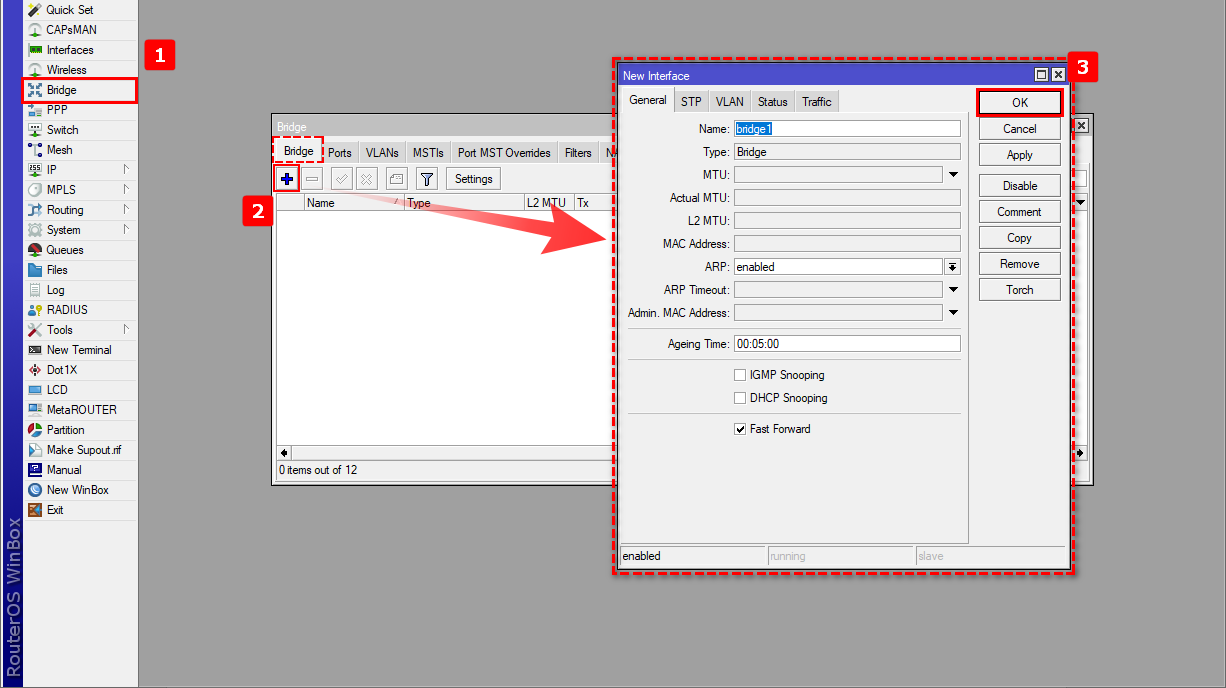
Bridge Creation
1 We are going to create a bridge to assign an IP from the default administration network of the OLT and also to assign an IP for when we change the default network.
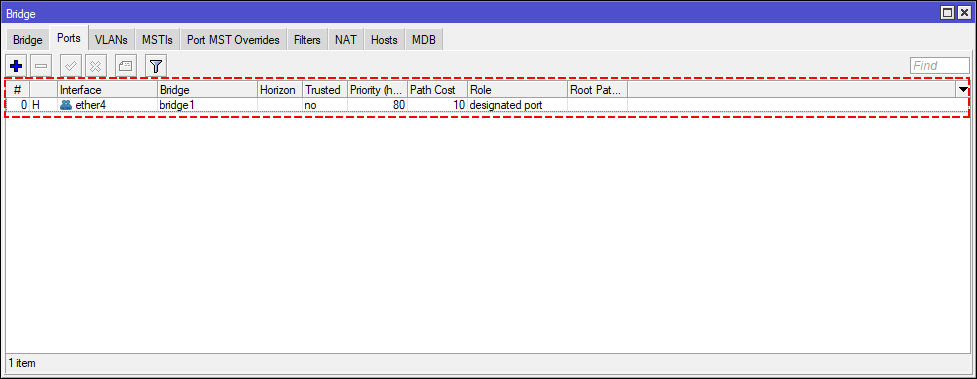
We go to the Bridge section in the menu of our RouterBoard to generate the bridge1 interface and thus be able to group the ports that will be working on the OLT network.
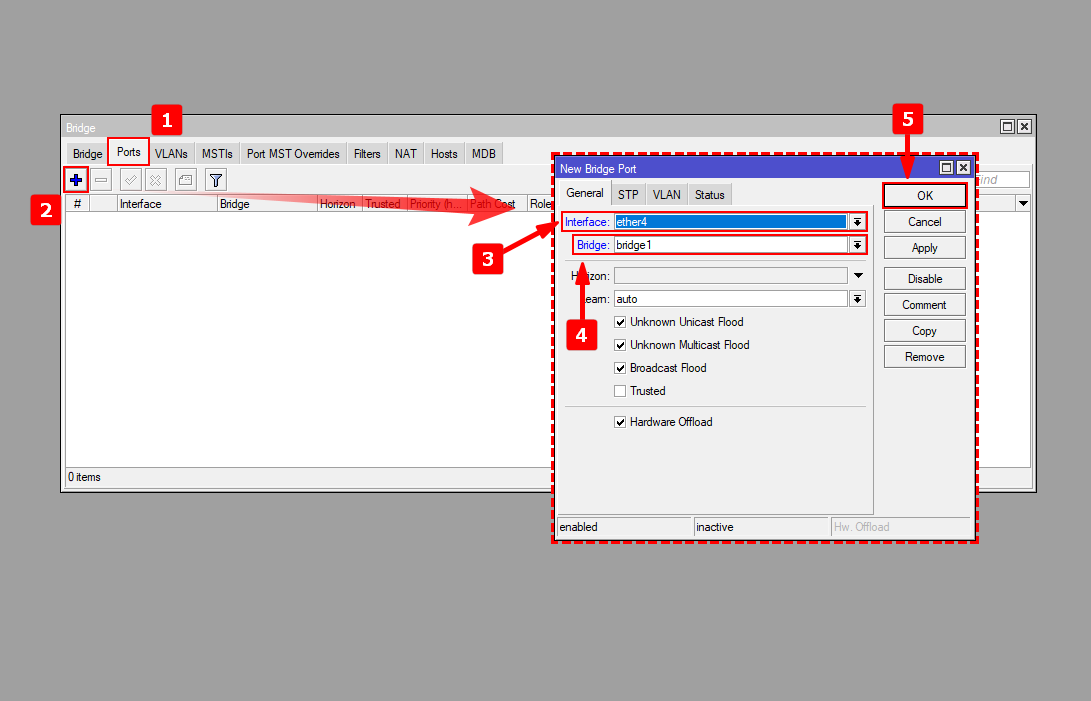
2 We assign the two ports that connect to the OLT to bridge1.
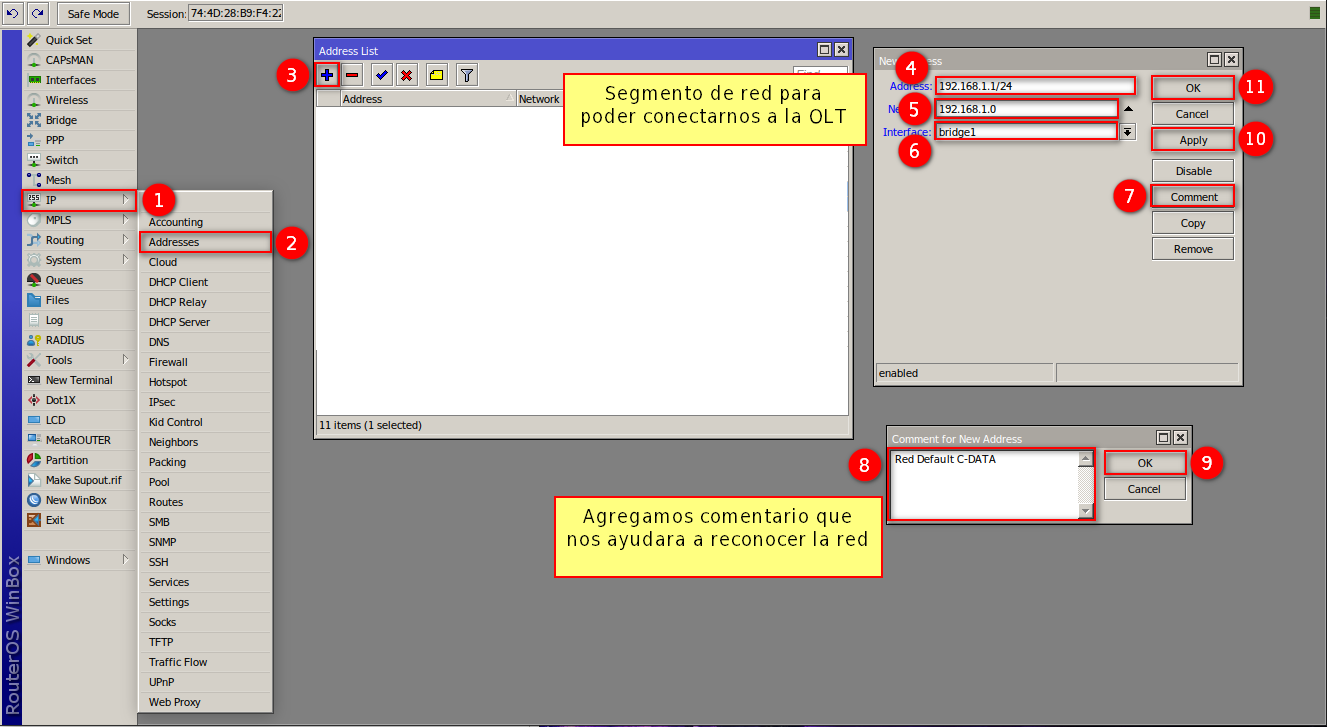
Creation of Network Segment to connect our OLT by Default Ip
For this step, we will create a network segment to be able to connect to our OLT through the Default IP, the network must be similar to the 192.168.1.1/24 segment
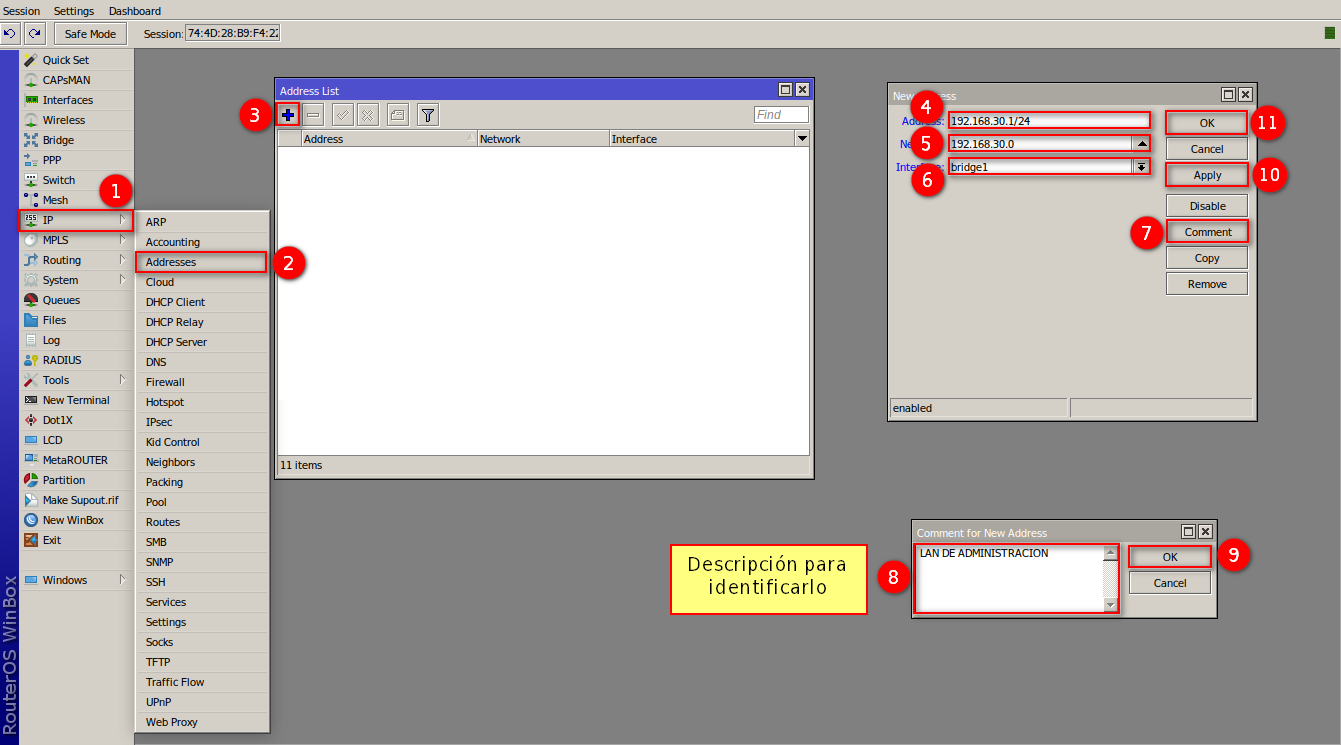
Creation of Network Segment to connect our OLT
Change Default IP of the OLT
For our example, we will use the 192.168.30.0/24 segment.
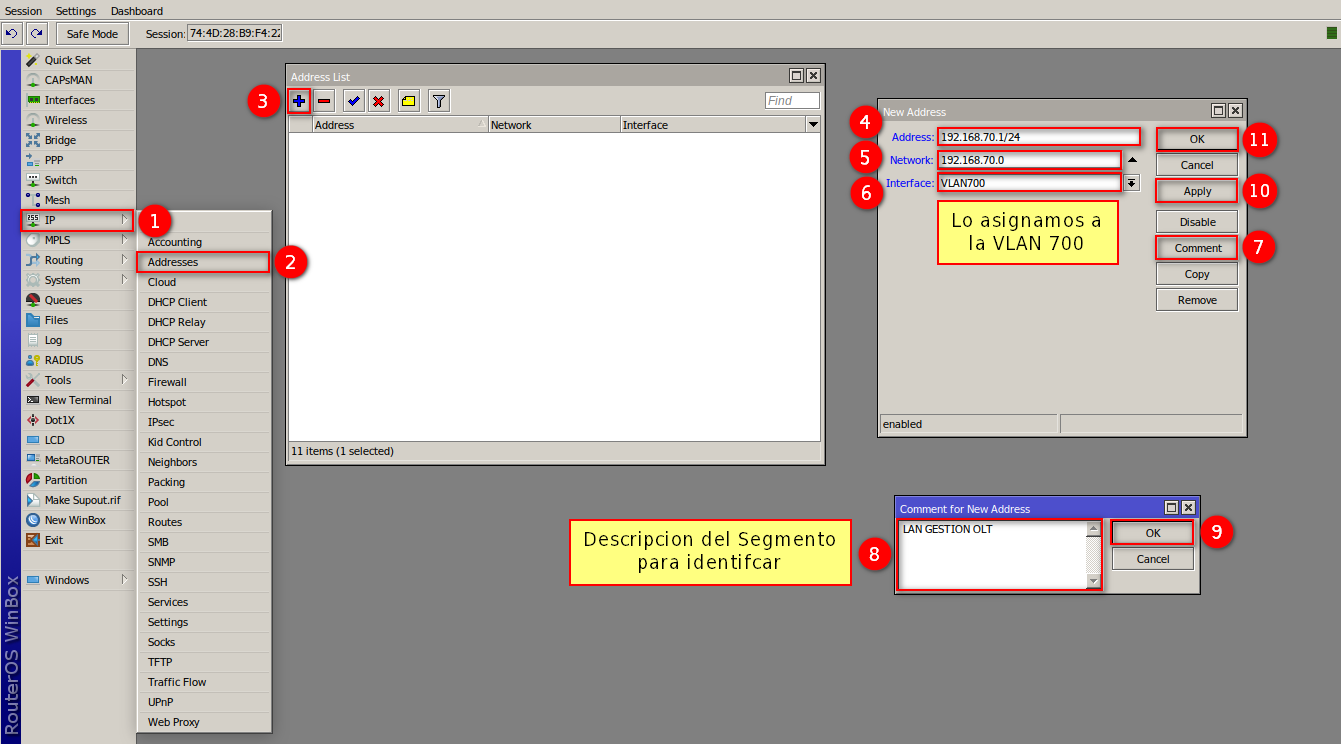
Creation of Administrative VLAN and Network Segment
For our OLT to have internet output, it is necessary to create an Administrative VLAN, for this example, VLAN 700 will be created, with the Network Segment 192.168.70.0/24
Administrative VLAN

Administrative VLAN Network Segment
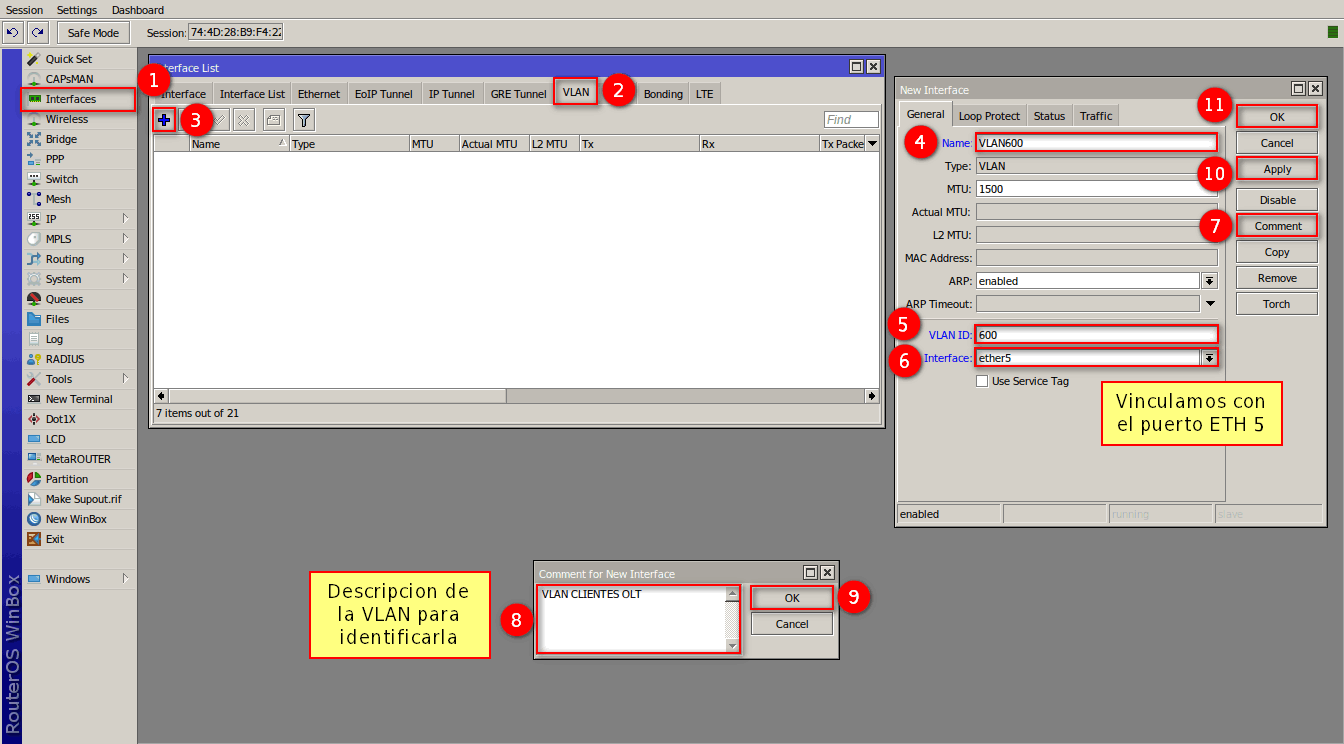
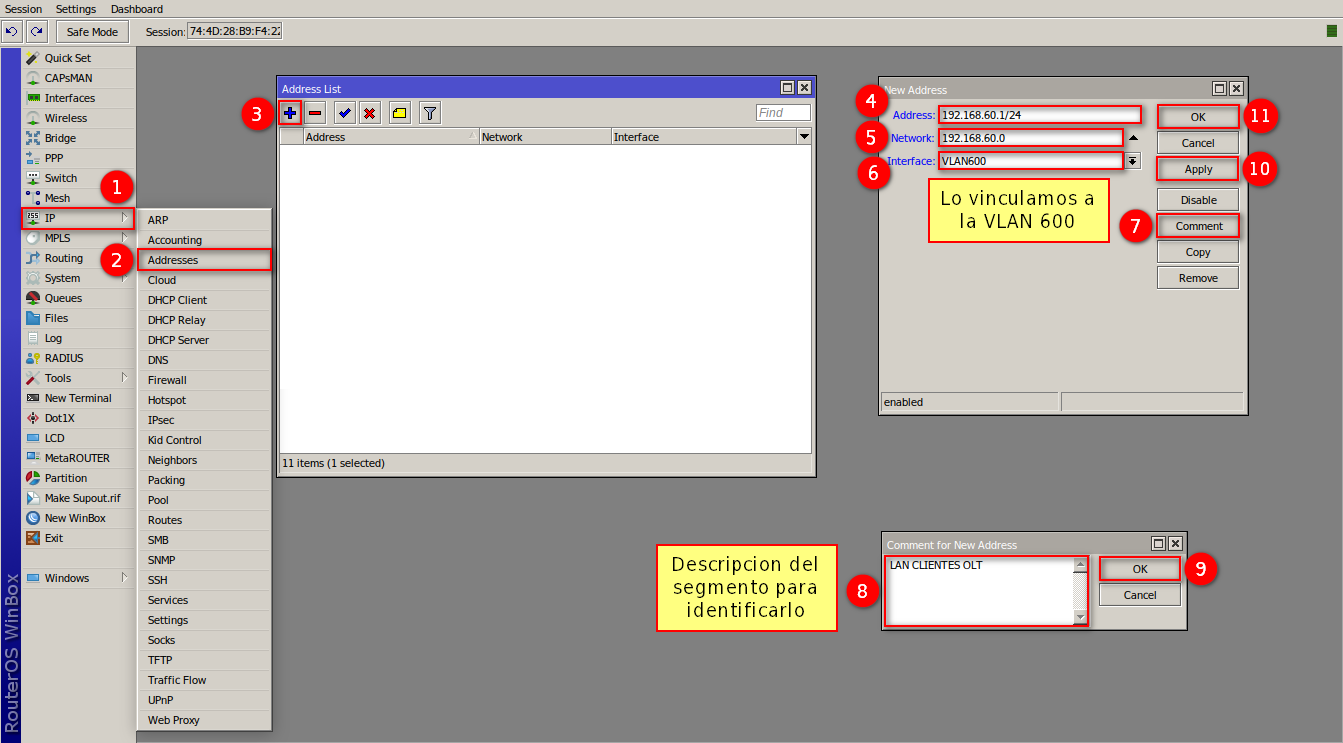
Creation of VLAN and Network Segment for Clients
To provide the service, we must create a VLAN for the clients, for this example, VLAN 600 will be created, with the Network Segment 192.168.60.0/24
VLAN for Clients
Clients VLAN Network Segment
Next Step
April 12, 2024, 3:32 p.m. - Visitas: 16586